Maya – Diary Log and Conclusion


Task

Screen Shot 2019-02-01 at 15.12.32.png

In the animation, I set my character at the beginning of the obstacle course and start with by jumping the character on the stepping stone as it is fairly easy to do. For this part, I do not need to work on the legs as the hips will be doing the majority of the work. Also, I will be concluding a blocking stage where I plan out each movement that my character will be doing. I find that much easy than just going along and move each limb in each frame.

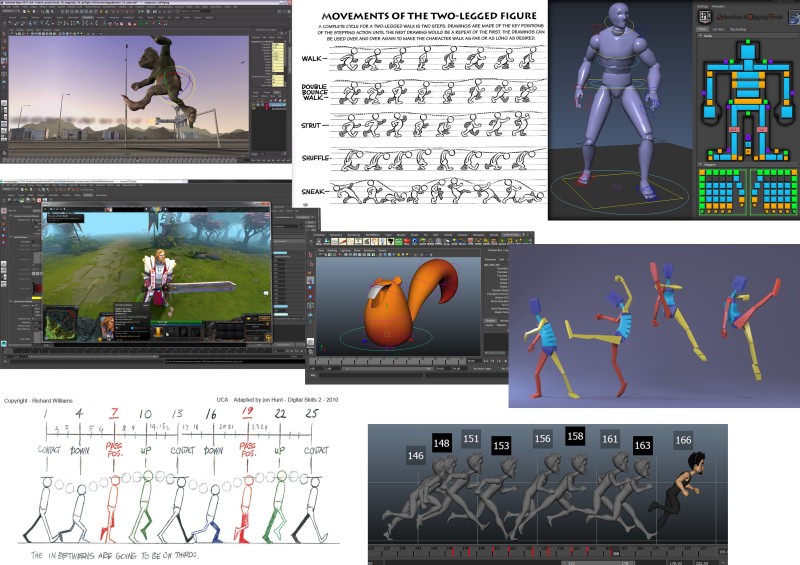
Once I finished the jumping stage, I went towards the walking stage. I have understood the process of where each leg should go at but as I have little experience of the program, I was finding it very hard to manoeuvre around the environment and it was stressing me out with all the other function in Maya. However, I will keep trying even though I am struggling in this software.

In the time that I have left, I only have time to do a 20-second animation and I know that I can make it even better if I had better time management and gain more knowledge and practice with the software.

There was some part of obstacle course where I struggle and I just would jump over it, I know it shows a very limited amount of my movement but because of time that I have left in this project, I just needed to squeeze that last 20 seconds inside so that I have something to show. I didn’t want to be someone who has nothing to show but if I were to do the whole project again, I would ensure that I have enough practice with my character movements and know different alternate when working in Maya.

When I was opening Maya I’m home, the skin of my character would not show and I may not know how to solve that problem at college. If I do get the chance to get the computer in college, I will apply the skin to attach my character.

Conclusion


Overall, the movement was very rushed and the character would glitch through the obstacle course and I needed more time to refined the animation. However, what I do like is the jumping and walking movement as you can see the movement clear despite the fact that it is loose and not completed. If I were to improve next time when I am animating in Maya, I will ensure that I start learning a new program as soon as possible so that I don’t struggle next time and I need to use my time effectively to make sure that I do not stress and struggle.

Feedback

Once I was finished with my animation, I presented in front of my classmate and they all give back some answers to help improve next time that I do animation in Maya.

1

I can understand why the majority of the people enjoyed the animation due to having a humorous ending. However, it does not count as animation and I need to add in more movement to the character. I felt like if I manage my time wisely, I could have added more movements and making sure that I was applying the principles of animation.

2

I personally believe that the animation was just right and I made sure that it was not too fast at all. I do understand that some people may say it is too short as I only managed to complete the first half of the obstacle course. I feel like, for next time, I will be keeping the same pacing with the character but making sure that the animation is smooth and not unstable.

3

Finally, with some of the improvement that I could have made such as better movement and ensure that the animation that I had left. I wish I didn’t add the flying part but I did not have enough time and I want to make sure that the character reaches to the end of the obstacle course but I now know what to do next if I were to do this project again.

Maya – Treatment

Task

In this assignment, I would need to animate the character that I would create in Autodesk character generator and configure the limb to produce a movement to participate in an obstacle course.

The character that I have created is myself and he is wearing a suit as it fits my personality and I really like wearing suits.

What I will be doing for this task by making sure that the character will participate in an obstacle course using parkour by changing the position of the keyframes which allows the character to move freely in the environment. The time limit for this animation will be 20 to 30 seconds as it takes a long time to render a 3D animation.

The model will be at a low resolution as I am showing the animation and not the modelling part of the obstacle course. Maya will be the only software that I will be animating and I know how to animate as it involves keyframes and I have learnt this method from After Effect.


Maya – Moodboards

Task

Maya Moodboard.jpg

In my unit, I need to show my understand of what animation is and what I need to do in my project. I have been assigned to make my character participate in an obstacle course by showing a series of movement and the personality trait. When I am animating in Maya, I need to consider where limb needs to move in the keyframe and portray a sense of personality into my character so that it is not boring to look at. My character will only be showing simple movements rather than complex as it would be harder and it will take longer to produce in the animation.

Maya – Filming References

Task

In my Maya animation, my character will need to compete in an obstacle course that he needs to get through, however, I do not know how to proceed my animation without any references and thus recording myself will allow me to have a guide that will support me throughout the animation.

When doing these movements, I did not want to be very complex and it would be very difficult to animate and it would take longer to produce such complex movement. I stick to simple movements and later in Maya, I could try out producing complex movement if I only have time in my work.


Walking

Jumping

Crouching

Crawling

Stepping on an object


Maya – Blocking Sheet

Task


This is the blocking sheet that I have produced for my animation. The reason why there is a third sheet is that I did not know how to set the image to a side properly and I was going to do my second part of the blocking sheet, however, one of my classmates has shown me how to set the image and thus which made my life easier. In the blocking sheet, some of the movement is very complex to produce Maya and I thought doing these movements will help make my animation look interesting, however, it will take a long time and I do not think this the best way to make animation fluid. For the block in the air, I might change it so that my character crawls under the block and I have a reference for when my character gets into position and out.

Even though my character will do a simple movement, I would like to implement personality so that my animation is more interesting such as scratching my head for something or he is checking something and pointing his fingers at them and etc.

Also, I may have forgotten to apply the timing for when my character does the movement but since the animation is going to be around 30 or 40 seconds long. I believe for I should aim for the first part to be 15 or 20 seconds long and the seconds part should also be 15 or 20 seconds as well.


Maya – Pixar Short Film

Film

Task

In the short Pixar film, it tells the tale of how day and night have their own advantages and disadvantages. They soon began to understand with each other and they come to appreciate each other.

Storyboard

  1. Day wakes up and starts to proceed with their daily lives.
  2. Day was wondering around and it spotted night.
  3. Night was sleeping until Day poked Night until it woke up.
  4. Day was not happy with Night because it did like what Day saw. Then this has made Night upset and annoyed thus leading a fight with Day.
  5. During the fight, Night suddenly saw something that was coming from Day’s perspective and he was enjoying the view.
  6. When Night tries to see it in its perspective, the beauty was not there as it was not happening in the day.
  7. Day realises that Night was upset as they could not receive the beauty of life so Day decided to show more beauty that was happening in Day which lead Night to show Day the beauty on the other side.
  8. They both started to get to know each other well and started to become friends.
  9. However, they both realise that they both cannot leave without each other and they depend on each other.
  10. As the sunset was appearing, they come to term with each other and they were on the opposite side with each other and they got to experience what its like to be Day and Night.

Software

Pixar uses a software called Renderman.

Art Style

The art style is a combination of 2D and 3D animation which can show how animators are able to use both styles of animation. Even though the 3D animation shows people’s everyday lives whilst 2D animations shows the emotions between Day and Night. It shows a very cartoonish appearance but it is easy to identify what is happening inside each scene. With Day and Night drew in a 2D aspect, they show personality towards the viewers and with that, they are given a likeable feature that the viewers can enjoy.

Lightening

When it is Day, it shows a bright vibrant light that shines on the environment whilst Night display a very dark blue colour but also a very melodic and gentle touch to put on at that time.

Kinematics

For this animation, I personally believe that the character is hand drawn, however, whenever the character moves, the environments change its position and the scale of the proportion.

Rendering

In the animation, an average frame can take up to seven hours.

Conclusion

In my opinion of this animation, I appreciate the approach of acceptance with each other despite the fact they are two different things. In the end, they have learnt that they are not alone and soon later can do the things that other person did perviously. Also, the combination of 2D and 3D animation works really well and the character that was design in 2D display a joyful characteristic which makes me feel happy to see these characters. I make take into consideration of displaying a 3D and 2D art style for when I am making a new animation.


Maya – Getting started on the Obstacle Cource

Task

In this brief, I need to make sure that I have produced my character on Autodesk Character Generator and making sure that I have settings correct. Then I download the files and import the character into Maya so that it is ready.

screen shot 2019-01-11 at 15.44.52

screen shot 2019-01-11 at 15.44.15

There are a couple of things that I need to do before I could reposition my character to the starting point. I need to delete the lights on the character as I will not be using them. Also, I will be deleting the master layer due to the reason of auto rigging my character with the quick rig tool.

screen shot 2019-01-11 at 15.47.03

This is the rigging area where I can animate the limbs of the character in Maya and I can slowly be applying the movement to the obstacle course.

screen shot 2019-01-11 at 15.44.08

This is my character at the very start of the obstacle course which is ready for me to animate. Even though it will be a challenge as I am a beginner in animating in this software, my determination will ensure that I have a fluid and smooth animation.

Maya – Movement of the Character

Task

In the task, we are getting used to import our characters doing a certain movement. Firstly, I had to create a character in Autodesk Character Generator which has to resemble like me so that I have an illustration of myself and I know how to create myself and I know myself better than anyone.

After I have made my character, I would import my character to Mixamo which allows having a large variety of movements for your character to have. Once I am happy with the movement of the character, I put them in the Maya and see how my character would move in Maya.

Once I have imported the movement in Maya, the movement is already set and I can view the keyframes in the timeline to see what is happening. This will get me to have a good understanding of how I should do the movement in Maya if I were to create my own set of moves.

Screen Shot 2018-12-07 at 15.02.19

Video

Whilst watching the video, it has got me thinking that I need to consider the entire body and not just one section of the body. This video has probably enhanced my understanding of observation on what I should do whilst I am animating in Maya.

Maya – Hierarchy

What are joint hierarchies and how to do they impact on the creation of an animated character?


A joint hierarchy is a series of child nodes that are connected to the parent nodes which is influenced by the joint’s action. Once it is completed, you allow the limb to move which will give a personality to the character.


Name one thing that non-manifold geometry cannot do?

Non-manifold geometry that has 3 shapes sharing the same shape. It cannot have 2 or more faces sharing the same vertex with no edges.

Describe 3 things that you can change when grouping objects together?

  1.   For grouping, the selected objects together – Select Edit > Group
  2.  To ungroup the selected group – Select Edit > Ungroup
  3.  To Select a group – Open the Outliner and expand the group node to show the objects inside the group, then click the object you want to select.


Give an example of how or when you might use a parent-child hierarchy?

For a parent-child hierarchy, it will be essential for creating the movement for limbs. When moving the parent nodes, it will move along with the child nodes that are connected to the parent nodes. Moving the child nodes will not affect the parent nodes as they are the brain of the hierarchy.


Name 3 different combine options within Maya?

  1.  Pivot Position – Positioned the pivot point to the object is combined
  2. Center – The pivot will align with the centre to all of the shapes being combined
  3. Last Object – The pivot will always be at the same point form the previous object that had the pivot selected


How might you use the selected options in your workflow?

Combine Options


Describe two things that you should be aware off when combining geometry in Maya?

Depending on how you positioned the pivot will alter the future of the shape when you are applying. Whilst using the Combine Options, you can control the location of the pivot.

Combing meshes can cause a catastrophe due to them that there will be an error in the non-manifold geometry where the faces would be adjacent and are pointing in the opposite directions. To avoid this error, Mesh Display > Conform to flip all normals.

Maya – Bowling Ball

Task

For this part of the task, the ball is colliding against the bowling pin and I need to work out the physic of how they would fall.

I got this model from Turbo Squid which is an fbx file which I can import in Maya. Once they were imported, I had to scale it down and the model was massive.

Screen Shot 2018-11-29 at 15.36.13

Once everything else was sorted, I need to set the anchor point to the bottom of each pin so that when I am rotating the pin, it would fall depending on the direction of the ball hitting. I found that when animating the pins, I can not copy the keyframes onto the other ones so I need to produce each action separately so that my animation is running smoothly.

Screen Shot 2018-11-29 at 15.33.05

With the orthographic panels up, I can position the model so that they align on the centre line.


Video

I believe that this is the hardest task for me as I was finding this difficult as I did not know how to make the pins fall down when a ball has made contact with it. This is something that I need practice with and I need to adjust my understanding in a 3D environment so that I know the physics of an object.