
Daily Archives: March 27, 2018
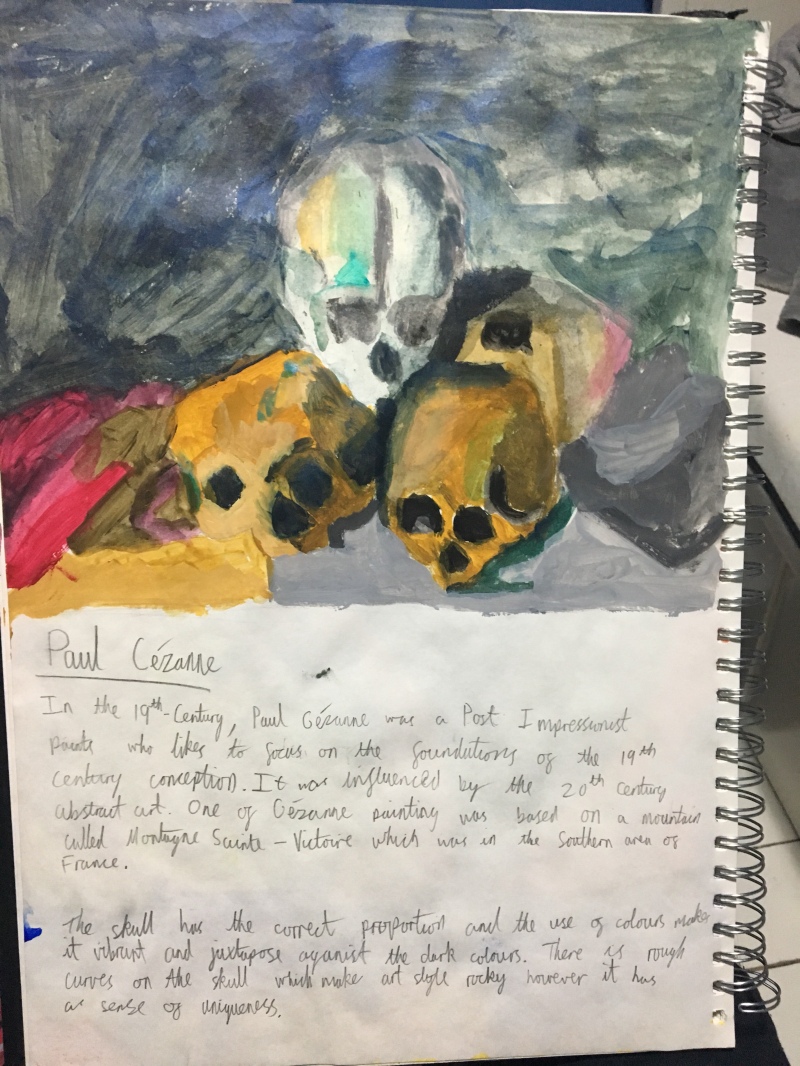
Art – Paul Cezanne
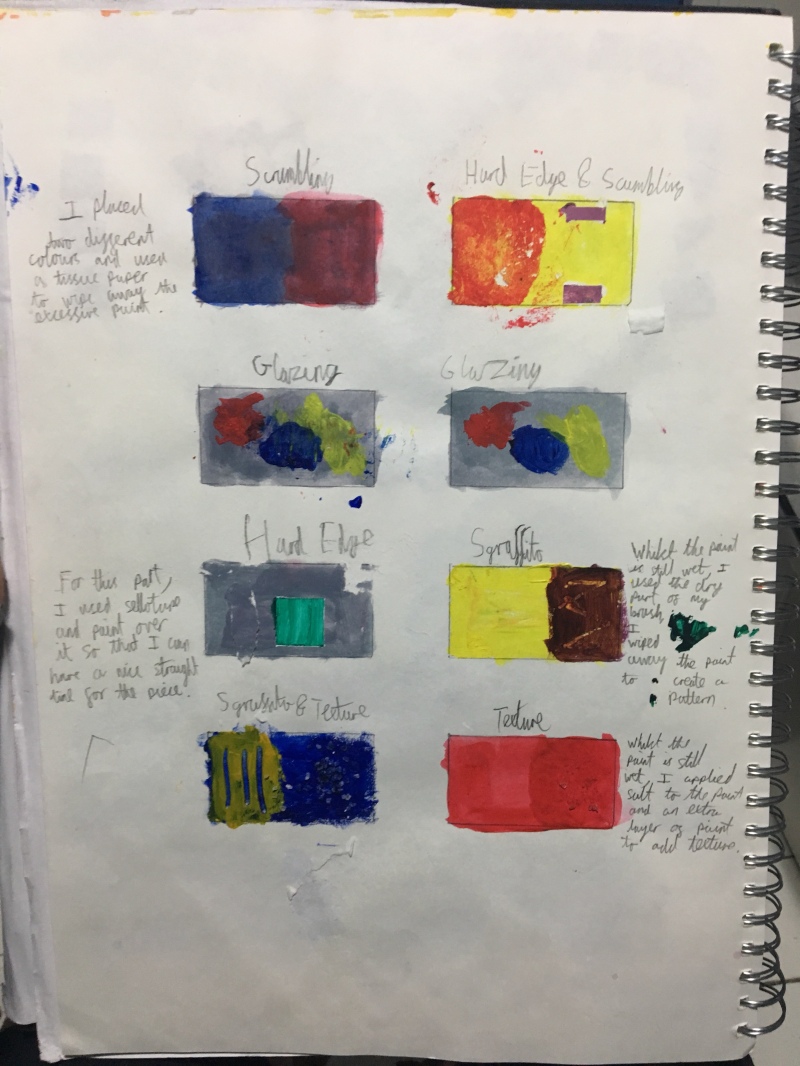
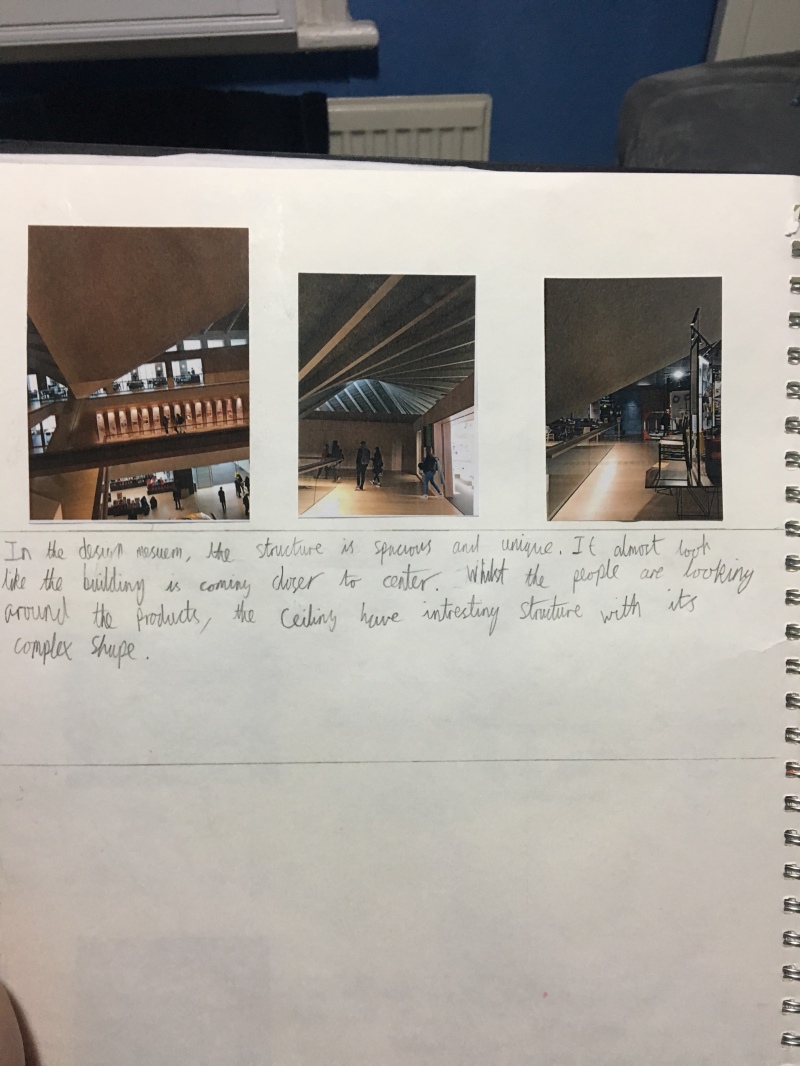
Art – Techniques
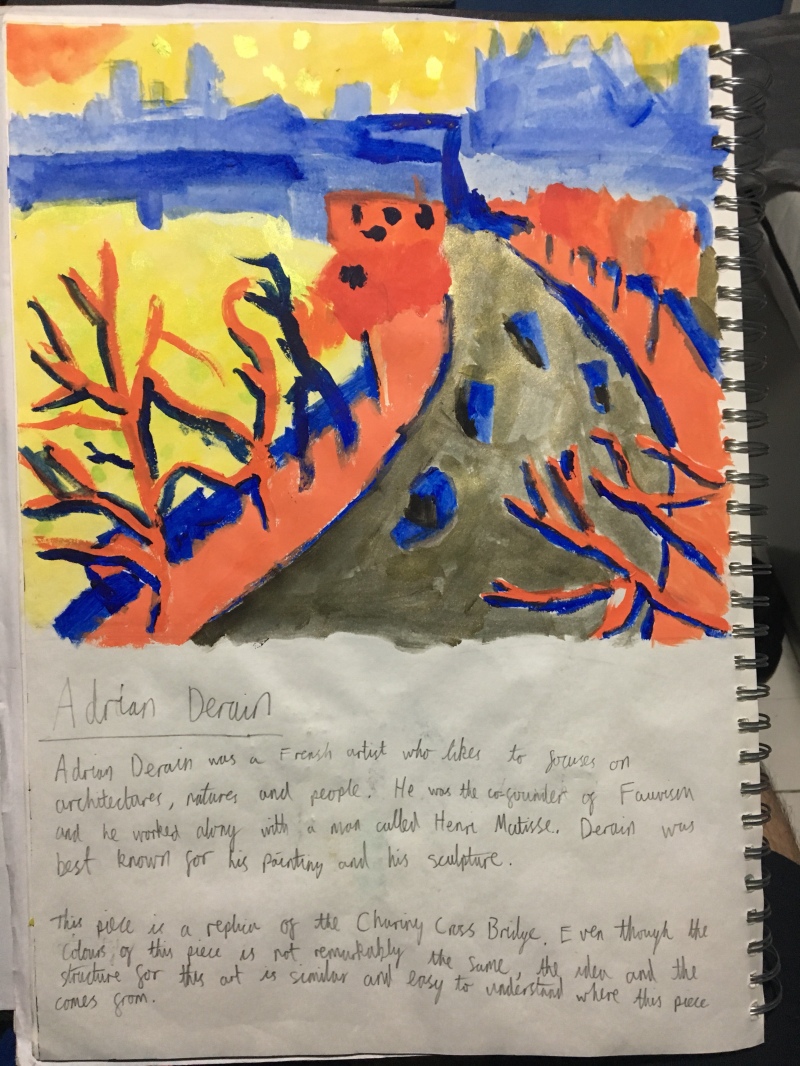
Art – Adrian Derain
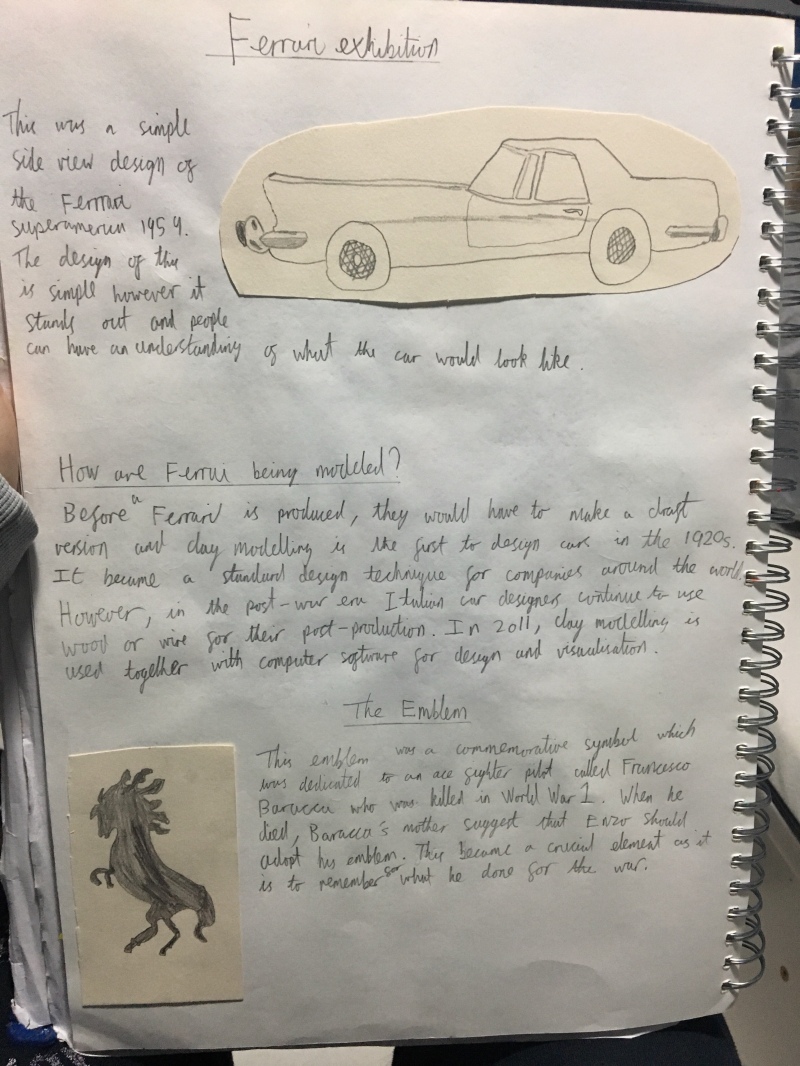
Art – Ferrari Exhibition


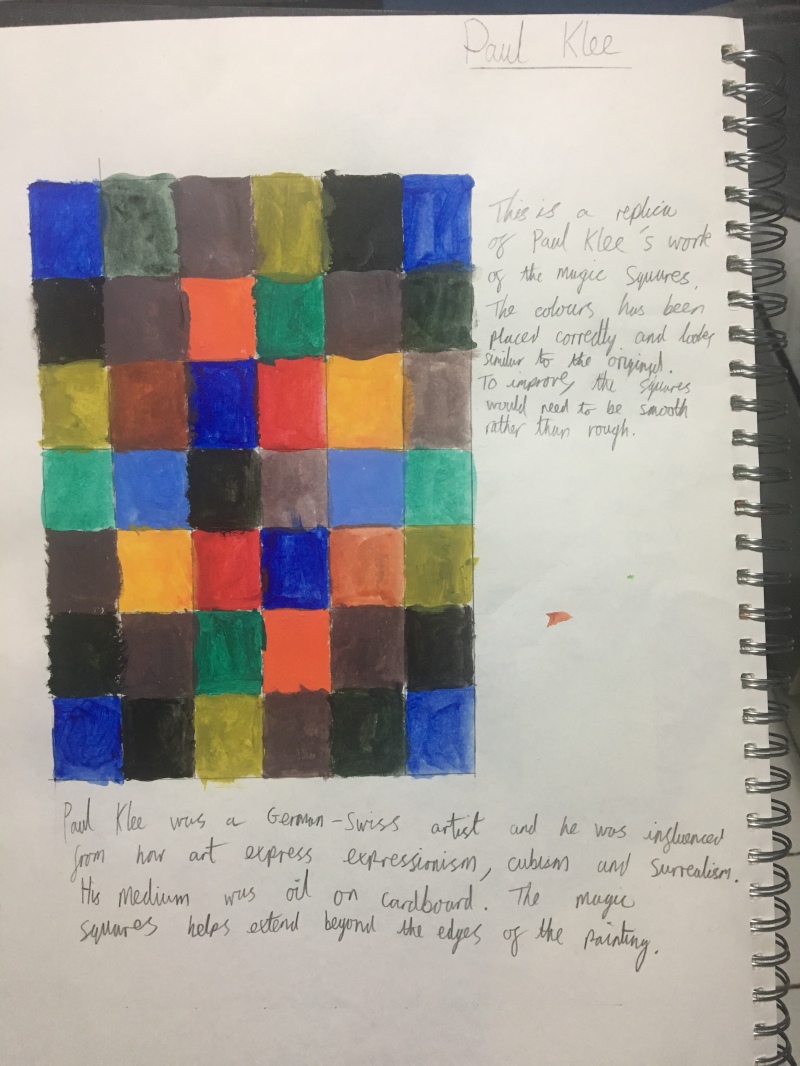
Art – Paul Klee
Art – Colour Mood

Animation – Zoopraxiscope
Images

Task

I used this image as a reference because I needed to know where I am going to place the frames in the zoopraxiscope. For this image, the opacity will need to be decreased so that I can draw the circle for it.

Once I got the outline of the circle, then I used the pigeon’s silhouettes that I made and placed them into the zoopraxiscope to see what it looks like and I personally believe that it looks good. Even though it has 11 frames, it still works perfectly.

Finally, I wanted to add a colour inside the circle so that it stands out and it does not blend with the animals as well. I used the gradient tool to create a nice light orange colour as I thought it would be appealing towards others.

To make the colours of the zoopraxiscope better, I used the eraser tool and made sure that the setting is set on the soft brush so that when I am using the tool, the colours on the zoopraxiscope looks like they are blending together and it makes it look attractive.
Export

I personally believe that this device really stands out towards others and by setting the animals inside the zoopraxiscope will help my animation be more interesting. To improve, this would be an option but I would like to see sliders on the device so that the frames have an equal amount of spacing between them.
