Images


Task
I needed to set the background image for myself to present the double exposure self-portrait. So I want I did was set myself in Photoshop.

First of all, I remove the excessive space that I did not require and kept the important parts. Then I masked the layer so that I and my friend are involved so that the background appears on the screen. Afterwards, I went to the layer that involves me and my friend and I adjust the brightness so that the layer becomes darker. Then I adjusted the levels so that the image is clear to see.
Next, I went to the layer that I selected the layer that is masked and clipped masked the background of the spooky forest.

Afterwards, I went towards the layer that includes myself and my friend and I changed the option to normal to overlay to show the background image.
Dodge Tool

Finally, I went to the dodge tool change the setting so that shadows was at 100% exposure and the brush size at 700 px and the hardness at 0%. This will show the brightness on me to show the contrast between light and dark.

Burn Tool

With this tool, I can make the brightness level darker. So what I did next have I changed the range to midtones and change the exposure to 25%. I applied this tool to my friend which came out to be an interesting outcome.
Conclusion
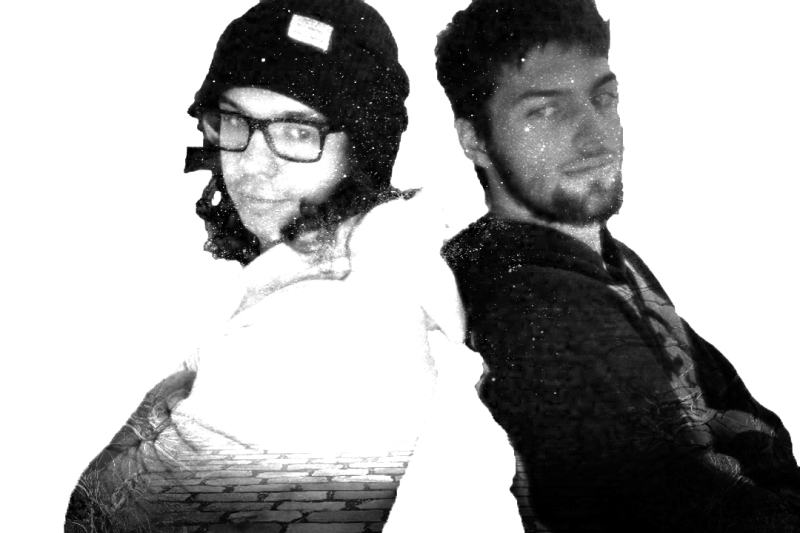
In this image, you can see the image is juxtaposed against the light and dark area which make look like the yin and the yang. I personally like the visual and the art itself works really well. The stars give it an interesting effect on the image. To improve, I could try different colours to see what effect it could have on the image.
